

The bedroom should be a sanctuary—a place of rest, tranquility, and refined personal style. While the mattress and the duvet are essential components of comfort, it is the sophisticated presentation of the bed linen, particularly the pillows, that truly elevates the space to a luxury retreat. A King Size bed, with its expansive dimensions, presents both a wonderful opportunity and a unique challenge for styling. A lack of structure can make the bed look bare or messy, but with the right technique, it becomes the stunning focal point of the entire room.
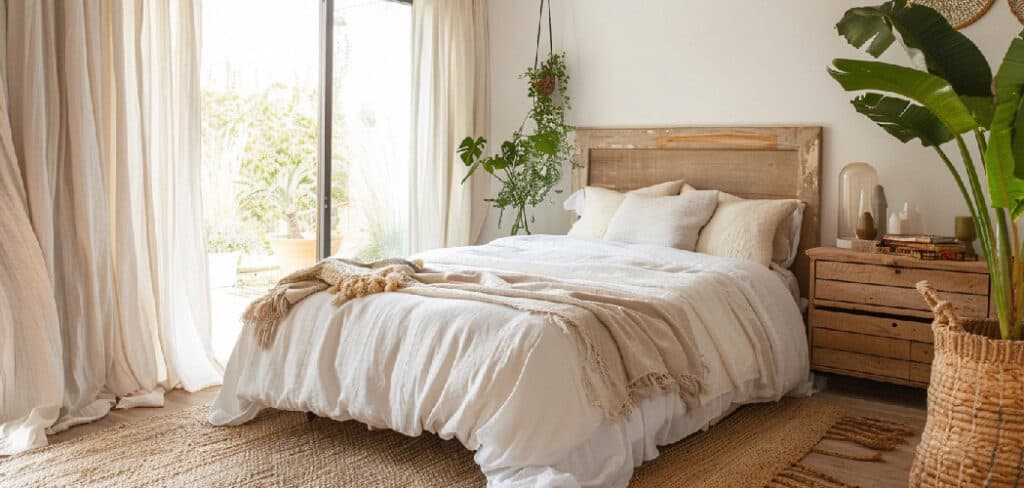
Learning how to arrange pillows on a king size bed is the definitive step toward creating a polished, designer-worthy aesthetic. This process is not about throwing pillows randomly; it’s about strategic layering, mixing textures, and using scale to create depth. By mastering these simple steps, anyone can transform their sleeping area into a highly curated, irresistible haven of comfort and style.
Explain in Beginner-Friendly Terms, the Benefits of Arranging Pillows on a King Size Bed
For beginners, understanding the benefits of arranging pillows strategically on a King Size bed is the first step toward achieving a luxurious bedroom design. Think of your King Size bed as a large, beautiful canvas. If you simply use two standard sleeping pillows, the canvas looks incomplete and stark due to the sheer width of the mattress.
The primary benefit is creating visual balance and fullness. A King Size bed is 76 inches wide; the pillows must fill that expansive width and provide a backdrop for the bed. Proper arrangement ensures the headboard area doesn’t look empty or flat, adding necessary dimension and height that draw the eye.
Secondly, a thoughtful arrangement is a powerful tool for injecting color, texture, and personality. Pillow covers and shams are the most versatile accessories. They allow you to introduce sophisticated patterns, vibrant accent colors, and tactile materials like velvet, linen, or chunky knit, all without committing to permanent changes. This layering is what signals a high-end, customized look.
Finally, the arrangement significantly enhances practical comfort and functionality. Using a variety of pillows—soft sleeping pillows, firmer European squares, and decorative accents—provides optimal support for everything from sleeping to reading in bed. A well-dressed King Size bed is a clear invitation to relax, transforming a basic piece of furniture into the most luxurious feature of the room.

Tools and Materials You’ll Need
- King Size Sleeping Pillows (2 or 4): Your essential, primary pillows for actual sleeping.
- King Pillow Shams: Covers for your sleeping pillows, used to match or complement the duvet cover and create a unified base layer.
- European Square Pillows (Euro Shams): Large, square pillows (26″x26″) essential for filling the vertical space against the headboard on a King bed. You will need 3 of these.
- Accent/Decorative Throw Pillows: Smaller pillows in various shapes (square, lumbar, bolster) to introduce color and pattern. Common sizes are 20″x20″, 18″x18″, or 12″x24″ for lumbars.
- High-Quality Inserts: Down, feather, or dense down-alternative inserts for the decorative pillows, ensuring they look plump and hold their shape.
- A Throw Blanket/Coverlet: A layered blanket placed at the foot of the bed adds texture and completes the professional, layered look.
- A Tape Measure: Useful for confirming the exact dimensions of your King headboard to ensure the pillows are perfectly scaled.
8 Step-by-Step Guide: How to Arrange Pillows on a King Size Bed
Step 1: Establish the Back Layer with European Squares
The first and most critical step in styling a King Size bed is establishing the foundational layer with European Square pillows, often referred to as Euro Shams. These large, typically 26″ x 26″ square cushions are specifically designed to fill the generous vertical and horizontal space provided by a King-sized headboard. Due to the width of the King bed, you will need to use three Euro Shams lined up across the back.
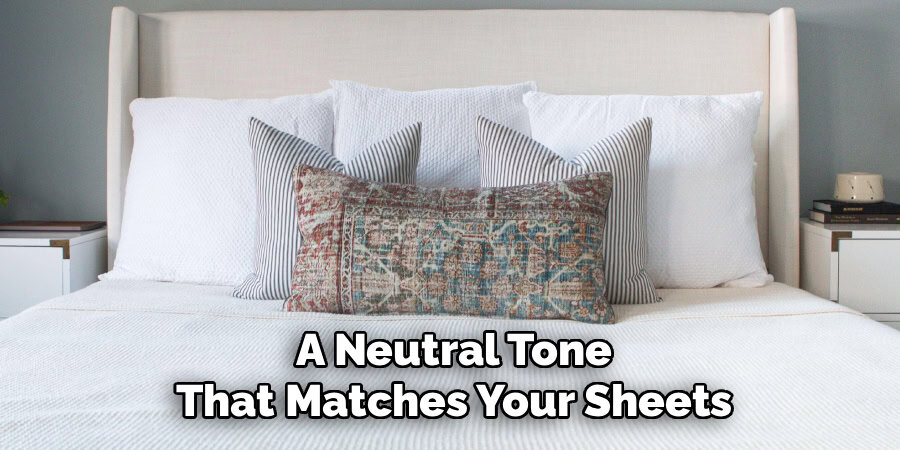
This trio acts as the necessary, towering backdrop, creating height and substance that traditional King-sized pillows simply cannot achieve alone. When selecting covers for your Euro Shams, choose a solid, textured fabric that is either the same color as your duvet cover or a neutral tone that matches your sheets. This uniformity ensures a calm, structured base upon which all the subsequent layers will be built. The purpose of this layer is purely structural, providing a cohesive visual barrier against the headboard and lifting the entire arrangement off the mattress surface. Without this robust back layer, the rest of your arrangement risks looking scattered and insufficient against the grand scale of the King bedding.
Step 2: Introduce the Functional King Sleeping Pillows
Once the three tall Euro Shams are securely in place, the second step involves integrating your functional King sleeping pillows. These are the pillows you actually use to sleep on, and they should be dressed in crisp, clean King-sized shams that either match your sheets or complement your duvet cover subtly. For a King Size bed, you have two primary options for arrangement here: either two King-sized pillows placed side-by-side, or four standard-sized pillows arranged in two stacked pairs. The most common and tidy approach is two King pillows placed in front of the Euro Shams, creating a comfortable, straight line across the bed.

These pillows serve as the main workhorse of the bed and should be slightly softer and less rigid than the decorative Euro Shams behind them. They create a crucial visual step-down in height from the back layer and a practical, plush surface. This step in how to arrange pillows on a king size bed is all about blending utility with aesthetics, ensuring the bed looks invitingly soft while maintaining the structure established by the backdrop pillows. Properly placed, these functional pillows also introduce a secondary, complementary fabric or texture into the overall display.
Step 3: Add an Intermediate Layer for Texture and Pattern
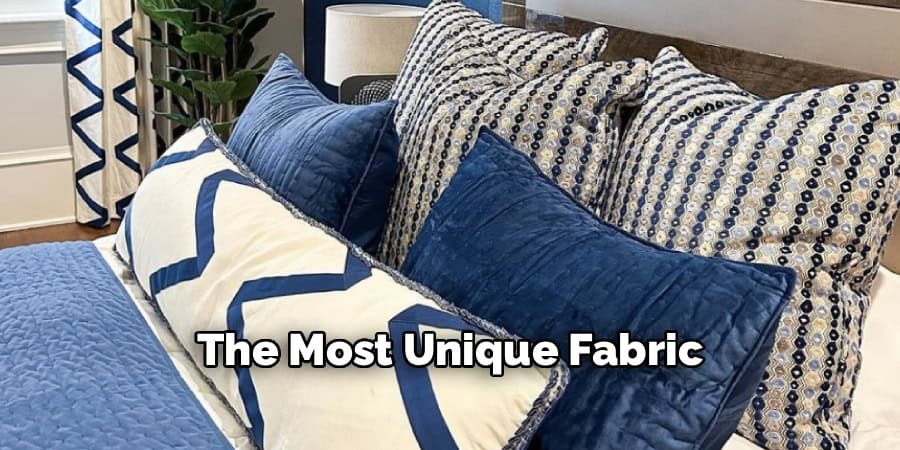
The third step in a sophisticated King bed arrangement is to introduce an intermediate layer of pillows that begin the transition from the large, structural layers to the small, personalized accents. This layer typically consists of two standard or slightly smaller square pillows, often 20″ x 20″ or 18″ x 18″ in size, placed directly in front of the functional King sleeping pillows. These cushions are your first major opportunity to inject texture and a medium-scale pattern into the design.
For example, if your back layers are smooth white cotton, this intermediate layer might feature a geometric print in a complementary color like navy and white, or a luxurious, solid-colored texture like a quilted velvet or a textured linen. The goal is to create a soft, visual contrast against the larger, smoother layers behind them. By using a different size and texture, you prevent the arrangement from looking blocky and ensure that the eye has something interesting to focus on as it moves from the back of the bed toward the front. This is where you really start building the visual narrative of your bedroom décor, moving from simple background elements to more intricate, decorative details.
Step 4: Layer in the Smallest Decorative Accent Pillows
With the structural and intermediate layers complete, the fourth step involves introducing the smallest decorative accent pillows, which act as the focal point for the entire arrangement. These are often small squares, typically 16″ x 16″, or a pair of smaller bolster pillows. This layer should be positioned directly in front of the intermediate pillows, often placed centrally on the bed or slightly overlapping the edges of the pillows behind them. These cushions are the “jewels” of the arrangement and should feature the boldest color, the most intricate pattern, or the most unique fabric.
For instance, a small pillow with elaborate embroidery, metallic threadwork, or an unconventional shape, like a circle or a textured knot, works perfectly here. Because these are small, they won’t overwhelm the arrangement, but their unique detailing ensures they command attention. Their purpose is to pull together all the colors and textures introduced in the previous layers, providing a final, concentrated burst of style. The careful placement of these smallest accents ensures the overall design feels complete, curated, and highly customized, adding the final touch of personalized flair.
Step 5: Introduce the Central Lumbar Pillow
The fifth step is arguably the most important for breaking the monotony of squares and rectangles on a King Size bed: introducing the single, central lumbar pillow. A lumbar pillow is a rectangular cushion, typically measuring around 12″ x 48″ or 14″ x 36″ for a King bed, though smaller lumbars (12″ x 24″) can be centered between two groupings. This long, single cushion should be placed horizontally in front of all the other layers, resting right in the middle of the bed. Its horizontal line provides a crucial visual break from the vertical and square shapes dominating the back layers, introducing a sense of fluidity and modern elegance.
Given its placement at the very front and center, the lumbar pillow should be a showstopper. It can feature a bold, wide stripe, an unexpected texture like leather or shearling, or a single, simple monogram. The choice of pattern here should ideally synthesize elements from the back layers—perhaps picking up the accent color from the Euro Shams and the texture from the intermediate squares—acting as the ultimate unifying element. The singular, focused nature of the lumbar pillow simplifies the arrangement while maximizing its decorative impact.
Step 6: Create Asymmetry for a Modern Look
While many traditional arrangements favor perfect symmetry (two of everything on both sides), the sixth step allows for a more modern, relaxed, and visually dynamic approach by introducing controlled asymmetry. Rather than lining up every pillow in perfect, mirrored pairs, try a subtle shift in the arrangement to make the bed feel more lived-in and stylish. For example, you might place a layered stack of three pillows on the left side (Euro, King Sleeper, Accent) and only two on the right side (Euro, King Sleeper), with the central lumbar slightly shifted toward the side with fewer pillows.
Alternatively, you could use a pair of matching accent pillows, but angle one slightly more than the other, or position a bolster on one side and a small square on the other. This deliberate break from perfect mirroring prevents the bed from looking stiff or overly staged, giving it a casual, professional elegance. The key is that the asymmetry must be intentional and balanced; the “weight” of the arrangement should still feel distributed evenly across the wide expanse of the King mattress, even if the groupings themselves are not identical.
Step 7: Master the ‘Chop’ and Fluffing Techniques
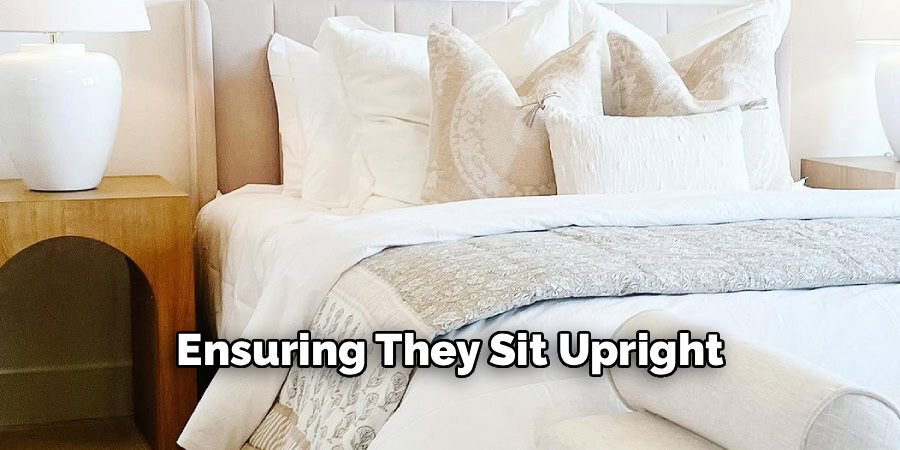
The seventh step involves the minor but essential detailing of fluffing and mastering the pillow chop. A high-end, professionally styled bed never has flat, lifeless cushions; they must look plump, full, and impeccably maintained. The “chop” is a designer trick where a gentle, quick karate chop is delivered to the top center of a square pillow (which must have a feather or down insert), creating a soft, inviting crease. This small indentation makes the cushion look luxuriously comfortable and custom-made.
After the chop, take the time to vigorously fluff every single pillow and sham, ensuring they sit upright and taut against one another. Push the corners out fully to avoid a saggy appearance. For the functional sleeping pillows, ensure the shams are pulled smooth and the pillow is angled comfortably. These techniques are crucial for maintaining the sophisticated structure of the arrangement, proving that the subtle details in how to arrange pillows on a king size bed are what separate a novice look from an expert one.
Step 8: The Optional Step: Layer a Throw Blanket at the Foot
To fully complete the professional, high-end look, the optional final step is to strategically layer a coordinating throw blanket or coverlet at the foot of the bed. This addition is the final layer of texture and color, transforming the bed into a multi-dimensional, luxurious cocoon. The throw should be folded neatly or draped casually over the bottom third of the bed, hanging slightly over the footboard or edge of the mattress.
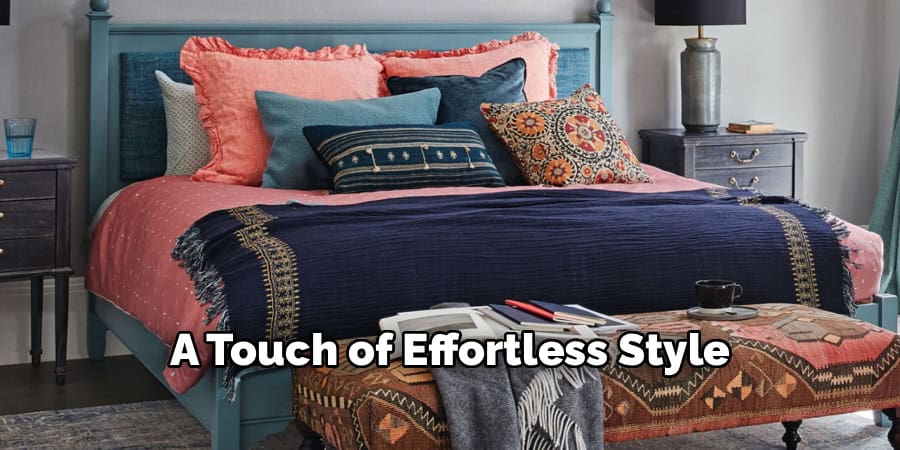
Choose a material that complements the pillows but provides a different texture—for example, if your pillows are mainly smooth cotton, use a chunky, soft wool knit or a luxurious faux fur throw. The throw not only adds visual weight to the foot of the bed, balancing the height of the pillows at the headboard, but it also adds an extra layer of warmth and a touch of effortless style. This final layer helps to ground the entire bedding ensemble and provides that quintessential, cozy, finishing touch.
Customization Tips
Personalizing your King Size pillow arrangement is what transforms the look from a catalogue picture into a genuine reflection of your taste. One highly effective customization tip is to integrate unique, non-traditional shapes beyond the standard squares and rectangles. Consider adding a small, cylindrical bolster pillow at the very front for a vintage-inspired look, or a decorative knot pillow for a modern, sculptural touch.
Another great trick is to use your accent pillows to introduce a singular metallic or texture. For example, a leather lumbar or a sequined cushion will instantly elevate the entire arrangement by adding a reflective, luxurious element that contrasts sharply with the soft fabrics of the bedding. Finally, for a maximalist approach, try the “six-piece Euro” approach, using three Euro Shams across the back and three different-colored but equally large squares layered in front of them, creating an ultra-plush, deep-layered look.
Common Mistakes to Avoid
The most critical mistake to avoid when styling a King Size bed is using too many small pillows that look dwarfed by the massive scale of the mattress. The King bed requires large-scale elements; if you only use 16-inch squares, the bed will look cluttered and the pillows will lack necessary height. Always start with the generous 26-inch Euro Shams to establish the required height.
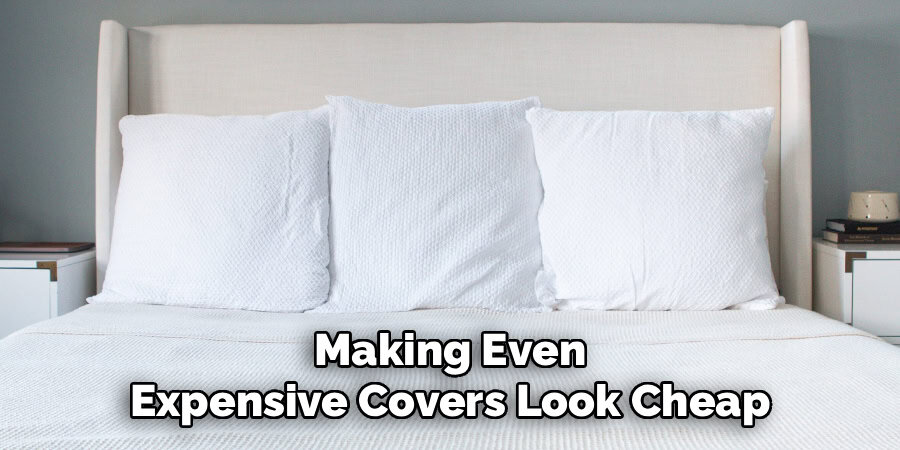
Another common error is neglecting the importance of pillow inserts. Flat, limp, polyester-filled cushions ruin the entire aesthetic, making even expensive covers look cheap. Ensure all decorative pillow inserts are 1-2 inches larger than the covers and are filled with feather or high-density down-alternative to achieve a plump, structured, and luxurious shape.
Lastly, avoid the mistake of mismatched heights. A successful arrangement must have a clear visual progression: the tallest Euro Shams at the back, stepping down to the King sleeping pillows, and finally descending to the smallest decorative pieces in the front. A flat line of pillows across the bed looks monotonous and lacks the professional depth achieved through thoughtful layering.
Frequently Asked Questions
What is the ideal number of Euro pillows for a King bed?
The ideal number of Euro pillows (typically 26″ x 26″) for a King Size bed is three. A King bed is approximately 76 inches wide, and three Euro shams placed side-by-side will perfectly span this width, filling the entire back section of the headboard.
Using only two Euro pillows on a King bed leaves significant space in the middle, making the arrangement look incomplete and undersized against the scale of the furniture. The trio of large squares provides the essential, high, and uniform backdrop necessary for supporting all the smaller, subsequent layers of pillows and accent cushions.
Should my accent pillows match my sheets or my duvet?
Your accent pillows should ideally complement both your sheets and your duvet, rather than perfectly matching either. The decorative pillows are your opportunity to pull in accent colors and subtle patterns from other areas of the room, such as the wall color, artwork, or rug.
A professional approach is to ensure the accent pillows share one common color with the duvet (e.g., a navy blue print if the duvet is solid navy) and then introduce a contrasting texture or color that pulls from the sheet color. This use of coordinating but non-matching colors and textures creates a far more rich and layered aesthetic than using all identical fabrics.

How do I stop my decorative pillows from falling over?
To prevent your decorative pillows from slumping or falling over, the key is to ensure they are properly supported and sufficiently plump. Firstly, always use pillow inserts that are 1–2 inches larger than the cover size; this overfilling makes the pillow firm and allows it to sit upright.
Secondly, you must ensure the large, back layers (the Euro Shams and King pillows) are pushed firmly against the headboard. The smaller decorative pillows lean against these large, firm layers for support. If the back pillows are limp or too far from the headboard, the entire arrangement loses its structural integrity and will quickly collapse.
What is the difference between a pillow and a sham?
The fundamental difference lies in their function and their edge finish. A pillow is the plush, inner cushion or insert itself, designed for comfort and support. A sham is the decorative case or cover that slides over the pillow.
Shams typically have a more formal or decorative finish than a simple pillowcase. They often feature an opening in the back (an envelope closure) instead of an end opening, and they frequently include a decorative, flat border of fabric around the edges, known as a flange or lip. Shams are primarily designed for display, while pillowcases are designed for frequent sleeping use.
What is the most flattering arrangement for a small bedroom?
For a small bedroom with a King Size bed, the most flattering arrangement is one that maximizes luxury while minimizing visual clutter, often using fewer pillows in larger sizes. Avoid the tendency to use many small throw cushions.
The most effective, streamlined look is achieved with a 5-pillow strategy:
- Three Euro Shams across the back (for height).
- One pair of King sleeping pillows placed directly in front of the Euro Shams.
- Eliminate the smaller accent squares and use only a single, sleek lumbar pillow placed at the very front to finish the look. This method maintains impact and structure without taking up too much bed space.

Conclusion
Mastering how to arrange pillows on a king size bed is the final, definitive step in transforming your bedroom into a luxurious, designer-quality retreat. By adhering to the principles of structured layering—starting with the essential three Euro Shams for height, introducing your comfortable King sleeping pillows, and finishing with the crucial textures and patterns of your decorative accents—you have built a foundation of elegance.
The careful selection of plump inserts and the use of the final, unifying lumbar cushion all contribute to an aesthetic that is both stunning and inviting. Your dedication to creating this layered, cohesive look will shine every time you walk into the room, turning your bed into an undeniable focal point. Remember:
- Structure: Always use three 26″ Euro Shams for the King width.
- Scale: Ensure a distinct step-down in size from back to front.
- Support: Invest in quality inserts that maintain the pillows’ shape.
- Style: Use the accent pillows to weave together the colors and textures of your room.

About
Emmett Finn is a distinguished figure in the world of Diy design, with a decade of expertise creating innovative and sustainable Diy solutions. His professional focus lies in merging traditional craftsmanship with modern manufacturing techniques, fostering designs that are both practical and environmentally conscious. As the author of diy, Emmett Finn delves into the art and science of furniture-making, inspiring artisans and industry professionals alike.
Education RMIT University
(Melbourne, Australia) Associate Degree in Design (Emmett Finn) Focus on sustainable design, industry-driven projects, and practical craftsmanship. Gained hands-on experience with traditional and digital manufacturing tools, such as CAD and CNC software.
Nottingham Trent University
(United Kingdom) Bachelor’s in diyfastly.com and Product Design (Honors) Specialized in product design with a focus on blending creativity with production techniques. Participated in industry projects, working with companies like John Lewis and Vitsoe to gain real-world insights.
Publications and Impact
In diy, Emmett Finn his insights on indoor design processes, materials, and strategies for efficient production. His writing bridges the gap between artisan knowledge and modern industry needs, making it a must-read for both budding designers and seasoned professionals.