

Learning how to identify antique furniture can feel like stepping into a living museum. Each curve, joint, and scratch tells a story about craftsmanship and history. Whether you’ve inherited an heirloom or discovered an intriguing piece at a flea market, knowing how to recognize genuine antiques helps you understand their value and authenticity.

This skill empowers you to make informed choices, appreciate traditional woodworking techniques, and avoid costly mistakes when buying or restoring vintage pieces. By observing style, construction, hardware, and other subtle clues, you can reveal the fascinating story behind any piece of furniture and connect with the artistry of past centuries.
The Benefits of Identifying Antique Furniture
Understanding the signs of true antique furniture offers both emotional and practical rewards.
For collectors, accurate identification ensures authenticity and preserves value. Knowing how to distinguish between an 18th-century dresser and a 20th-century reproduction protects your investment and builds confidence when purchasing.
For decorators and homeowners, authentic antiques bring depth and character to modern interiors. A well-worn farmhouse table or carved Victorian chair adds texture and charm that mass-produced items can’t replicate.
Even beyond beauty or value, identifying antiques deepens your appreciation for human craftsmanship. You start recognizing patterns across historical eras—the clean lines of Georgian design, the intricate carvings of Rococo, or the sturdy joinery of Mission-style furniture. This knowledge transforms ordinary shopping into an exploration of art, culture, and design history.
Tools and Materials You’ll Need
Before examining furniture, gather a few simple tools to help you spot key details.
- Magnifying Glass or Loupe – For close inspection of joinery, saw marks, and hardware details.
- Flashlight – Essential for looking into drawer corners or underneath tabletops where maker’s marks often hide.
- Tape Measure – Accurate dimensions can help identify period-specific proportions.
- Notebook and Pen – Record findings such as materials, joinery type, or unusual markings.
- Camera or Smartphone – Photograph details to compare with verified antiques later.
- Soft Cloth – Gently clean dust or grime without harming the patina.
- Small Screwdriver – Helpful for carefully examining hidden construction areas or removable back panels.
Having these items on hand allows you to uncover clues while protecting the furniture’s integrity.

Step-by-Step Guide: How to Identify Antique Furniture
Step 1: Study the Overall Style and Shape
Begin by observing the piece’s silhouette. Furniture design has evolved through distinctive periods, and identifying the overall form often narrows down its age. For instance, Queen Anne furniture from the early 1700s features graceful cabriole legs and understated elegance. Victorian pieces, by contrast, showcase ornate carvings, rich woods, and heavy proportions. Pay attention to the proportions—are the lines delicate or bold? Straight or curved? If a piece combines mismatched stylistic features, it might be a reproduction or a “married” item made from multiple parts. Comparing your piece with images of known historical examples helps train your eye to notice these stylistic differences quickly.
Step 2: Examine the Type of Wood
Different periods and regions favored different woods. In the 18th century, furniture makers commonly used solid walnut, oak, or mahogany for visible areas and cheaper secondary woods like pine or poplar for hidden sections. Lift drawers or peek underneath to see if multiple wood types are present. Also, study the surface color and texture. Genuine patina—formed by decades of oxidation, sunlight, and handling—has a rich, uneven depth.
Modern finishes, on the other hand, look uniform and glossy. A natural, timeworn patina adds authenticity and charm, while overly smooth or newly polished wood may indicate refinishing or reproduction.
Step 3: Look at the Joinery
Joinery reveals how a piece was constructed. Before machines became common in the late 1800s, craftsmen hand-cut joints, resulting in slight irregularities. Pull out drawers and examine the dovetails—the wedge-shaped interlocking joints at the corners. Hand-cut dovetails vary in width and spacing, while machine-cut versions appear perfectly even. Check for wooden pegs, dowels, or mortise-and-tenon joints—hallmarks of pre-industrial craftsmanship. Screws and nails also tell a story: handmade screws have uneven slots and blunt tips, whereas modern ones are uniform and pointed. Understanding joinery helps you date furniture with remarkable accuracy.
Step 4: Inspect the Hardware
Handles, knobs, hinges, and locks provide strong evidence of a piece’s era. Brass hardware oxidizes over time, creating a dull, dark patina. Original fittings often show wear consistent with the surrounding wood—small dents, scratches, or discoloration. If hardware looks too new or mismatched, it may have been replaced. Familiarize yourself with historical hardware designs: Chippendale “batwing” plates from the 18th century, Hepplewhite oval pulls, or Art Deco chrome handles from the early 20th century. Examine how hardware is attached—screws with off-center slots or hand-forged nails suggest authenticity, while Phillips-head screws date no earlier than the mid-20th century.

Step 5: Search for Maker’s Marks or Labels
A maker’s mark can serve as a signature of authenticity. Look for paper labels, ink stamps, or burned-in brand marks under tabletops, inside drawers, or on the back. Renowned furniture makers like Duncan Phyfe or Gustav Stickley often branded their names or workshop marks onto their creations. However, beware of forged labels on reproductions—they tend to look too crisp or freshly glued. If you find a genuine mark, research it in antique reference books to learn more about its origin and approximate date. Maker’s marks not only authenticate the piece but can also greatly influence its value.
Step 6: Observe the Signs of Wear
True antiques display consistent wear patterns that reveal their history of use. Edges of armrests, chair stretchers, and drawer fronts naturally show smoother areas from decades of handling. Drawer runners may wear where wood has repeatedly rubbed. Authentic wear is uneven and logical—heavy on parts that would be touched or moved, light on hidden surfaces. Artificial distressing often looks contrived or misplaced. For example, scratches on the back panel of a dresser that always stood against a wall are suspicious. Trust genuine imperfections; they are often the most telling signs of age.
Step 7: Evaluate the Underside and Back
The least visible areas can be the most revealing. Flip chairs or inspect the back of cabinets for saw marks or unfinished wood. Hand-sawn boards leave straight, irregular marks, while machine-cut lumber shows circular patterns. Older furniture may have oxidation, dust, or slight warping in hidden spots. Check for old glue residue or small wooden blocks used for structural reinforcement—these were common in traditional construction. The underside of tables often retains untouched evidence of the original woodworking process, helping you distinguish genuine antiques from later reproductions.
Step 8: Consider Proportions and Craftsmanship

Earlier furniture pieces were handmade, and small imperfections are part of their charm. Symmetry might be slightly off, or two legs may not match perfectly. Such irregularities reflect human craftsmanship, unlike machine-made precision found in later reproductions. Observe the carving depth, inlay precision, and alignment of parts. The quality of workmanship often indicates whether the maker was a skilled artisan or part of a factory production line. High craftsmanship, paired with appropriate stylistic and material clues, almost always signals an authentic antique.
Step 9: Check Upholstery and Materials (if applicable)
For chairs and sofas, upholstery can reveal much about a piece’s age. Original stuffing materials like horsehair, straw, or cotton batting feel coarse and uneven. Synthetic foam padding didn’t appear until the mid-20th century. Examine the underside for webbing made from jute or linen secured by tacks rather than staples. Even if the fabric has been replaced, the internal structure often remains original. These subtle differences in materials provide crucial evidence when determining authenticity.
Step 10: Document and Compare Findings
Finally, record every observation—wood type, joinery, hardware, labels, and condition—and compare it with trusted references. Museums, antiques guides, and professional appraisal databases can help confirm your conclusions. Over time, you’ll develop an instinct for recognizing genuine antiques by sight alone. Remember, documentation not only aids identification but also adds provenance when you choose to sell or insure your piece.
Customization Tips for Identifying Antique Furniture
Once you grasp the basics, specialize in one era or maker to sharpen your expertise. Create a digital photo catalog of confirmed examples to reference when shopping or appraising. Pay attention to recurring features—such as the shape of feet, drawer construction, or carving motifs. By building a focused knowledge base, you’ll spot authentic pieces faster and gain confidence in assessing subtle details.
Common Mistakes to Avoid

New collectors often rely too heavily on a single feature, like dovetail joints or patina, to determine authenticity. Always consider the piece holistically. Another mistake is ignoring inconsistencies in hardware or materials—replaced parts can reduce value or indicate reproduction. Finally, avoid cleaning or refinishing before a professional evaluation. Removing the original finish can strip away years of valuable patina and historical integrity. Patience and observation are your best tools in uncovering authenticity.
Frequently Asked Questions
What qualifies furniture as an antique?
Generally, a piece must be at least 100 years old to be considered an antique. This definition is recognized by collectors and customs authorities alike. Anything newer but still over 20 years old often falls into the “vintage” category. However, age alone doesn’t guarantee value—rarity, craftsmanship, and condition play crucial roles in determining worth.
How can I tell if a piece has been refinished?
Look for inconsistencies in the sheen or texture. Original finishes usually show natural wear, darkened corners, or minor surface cracks known as crazing. Refinished pieces often have a uniform, overly glossy surface. You might also spot finish buildup in joints or hardware recesses, indicating a modern restoration.
Are reproductions worthless?
Not at all. Well-made reproductions can still hold decorative and sentimental value. However, they typically lack the historical and investment appeal of true antiques. Their worth lies in craftsmanship and design rather than age or rarity.
Why do some antiques use more than one type of wood?
Many authentic antiques feature both primary and secondary woods. High-quality woods like mahogany or walnut were used on visible areas, while inexpensive woods like pine were used inside drawers or back panels. This was a common practice in early craftsmanship and a sign of authenticity, not deceit.
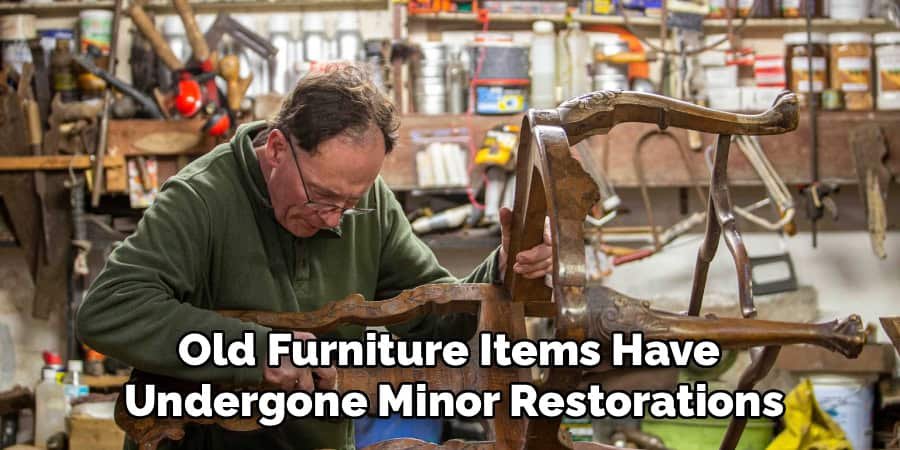
Can modern nails or screws ever appear in genuine antiques?
Yes, but only if the piece has been repaired or modified. Many old furniture items have undergone minor restorations over the decades. The key is whether these updates make sense for the piece’s age and wear. A mix of old and new fasteners isn’t uncommon, but should be consistent with logical repair work.
Conclusion
Mastering how to identify antique furniture turns curiosity into expertise. Each piece tells a unique story through its materials, joinery, and patina. By examining every detail—from the construction and hardware to subtle signs of age—you’ll develop an intuitive sense for authenticity.
Remember these essentials:
- Observe style, craftsmanship, and consistency.
- Study wood types and finishes closely.
- Verify details like maker’s marks and joinery.
- Take time to compare with trusted references.
With patience and practice, you’ll gain confidence in uncovering genuine antiques. Every discovery becomes a window into the past, connecting you to generations of artisans and their timeless creations.

Emmett Finn is a furniture designer and DIY design specialist with over a decade of experience in furniture design, sustainable craftsmanship, and practical home solutions. His work focuses on blending traditional woodworking techniques with modern design and manufacturing methods to create furniture that is functional, durable, and visually appealing.
As an author at Furnivilla.com, Emmett shares clear, hands-on guidance to help homeowners, DIY enthusiasts, and design lovers make better furniture choices. From material selection and furniture care to space-efficient design and DIY improvement ideas, his content is rooted in real-world experience and practical usability. Emmett believes good furniture should not only look great but also serve everyday needs comfortably and efficiently.
Education
RMIT University
Melbourne, Australia
Associate Degree in Design (Furniture)
Focused on furniture design, sustainable materials, and industry-driven projects. Gained hands-on experience with traditional craftsmanship and digital manufacturing tools, including CAD and CNC technologies.
Nottingham Trent University
United Kingdom
Bachelor’s Degree in Furniture and Product Design (Honors)
Specialized in furniture and product design with an emphasis on combining creativity with modern production techniques. Participated in real-world industry projects, collaborating with established brands to gain practical design and manufacturing insight.
Publications and Impact
Through Furnivilla.com, Emmett Finn publishes practical, easy-to-understand articles on furniture design, DIY projects, materials, and home improvement. His writing bridges the gap between professional design knowledge and everyday use, helping readers make informed decisions about furniture, maintenance, and space optimization.